Showing posts with label recipe. Show all posts

Wednesday, November 3, 2010

pumpkins, part one

Oh hey there, friends. Meet the worst blogger ever. (One posting in October? What kind of "schedule" does that follow, exactly?) This post is not exactly complete (hence the whole "part one" thing up top), but I thought I'd try to throw something up here before you forgot about me completely.

By the way, I really like you! Anyway, onto pumpkins.

Jena came to California last week! It was pretty much amazing. True to Stephanie fashion, I neglected to pull out my camera for the vast majority of the week, and thus I only have 2 photos even worth sharing with you. (I know, I know.) But the quick rundown of what we did: giggled and smiled and hugged. Saw dolphins at Baker Beach! (Also, unsuccessfully tried to avoid awkward naked guy at Baker Beach.) Looked for parking. Pondered about Sufjan's life after his thought-provoking concert at the Paramount. Went to our first (and second...) drive-in movie. Ate stuff, a lot of stuff. And drank coffee. Of course.


It is a truth universally acknowledged that every person needs a good dose of hipster every now and then. We got a healthy helping with our breakfast our very first morning. (above: Blue Bottle Gibraltar, pumpkin buttermilk donut.)


If you're ever in the Temescal neighborhood of northern Oakland, you must must stop by Pizzaiolo for an espresso drink and a donut (Monday-Saturday, 8am-12pm). The pumpkin one was pretty TDF (and this is coming from someone who used to hate pumpkin).

Also...I baked some pumpkin bread. I don't actually have any of the bread to show you (whoops), but I did work really hard to lick all the batter off of the beater and spatula and bowl. See?


Since you dear people are so patient with me, I'll share the recipe with you. (Saw that one coming, did you?!) I also picked up a sugar pumpkin today at Trader Joe's, and I think it's high time I taught y'all how to make your own fresh pumpkin puree. (It's so fun!!) Next time, friends.

Pumpkin Chocolate Chip Bread
(adapted from Epicurious)

1 cup white sugar
1 cup brown sugar
1 cup vegetable oil (or other neutral-tasting oil)
3 eggs, preferably room temperature
14.5-16 ounces pumpkin, either canned (aka one small can/half of a big can) or fresh
3 cups all purpose flour
1 teaspoon baking soda
1/2 teaspoon baking powder
1/2 teaspoon salt
2 teaspoons cinnamon
1 teaspoon nutmeg
1/2 teaspoon ground ginger
1 cup chocolate chips (milk, semisweet, or otherwise)

Preheat oven to 350. Butter and flour two loaf pans (I sprayed mine with that amazing flour spray stuff. Makes my life easier.)

In the bowl of a stand mixer fitted with the paddle attachment, beat together both sugars and oil to blend. (Note: will look like crumbly, greasy sugar.) Mix in eggs and pumpkin until smooth. In a large bowl, whisk together the flour, baking soda, baking powder, salt, cinnamon, nutmeg, and ginger. (Note: the spice blend is something that I've tinkered with a lot. If you prefer a different proportion of spices, definitely adjust as desired. However, I've found that 3 1/2 teaspoons of spice is probably the minimum amount you'd want to use for two loaves of bread.) Stir flour mixture into pumpkin mixture in 2 additions. Mix in chocolate chips.

Pour equal amounts of batter into loaf pans. Smooth out the top with a spatula and bake until a toothpick inserted into the center comes out pretty clean, 60-70 minutes. Cool in the pan on a rack for 10 minutes, then tip the bread out onto the rack and let it finish cooling. (If you're not quite ready for two pumpkin bread loaves to enter your life simultaneously, one can be easily frozen by first wrapping it in plastic wrap, then foil (the double wrapping protects against freezer burn)).

Tuesday, September 21, 2010

ain't no party like a tea party


So...this happened a while ago. I hosted a tea party! Cue the harp music, pinkies crooked just so, and overly genteel manners. [top to bottom: lots of cookies, fruit, lemon olive oil cake, Dorie's cafe volcano cookies]


Cue the dainty pieces of fudge.


And the cookies! It wouldn't be a tea part without cookies. This party presented a special challenge: one of the guests, due to some dietary restrictions, sticks to a non-bad fats diet. I had to toss some traditional favorites out the window (scones and devonshire cream) because butter is fairly irreplacable, but in came some other fun things, like that lemon olive oil cake and these peanut butter cookies. Oh, the cookies. You can stud them with chocolate chips or do the traditional criss-cross with a fork after rolling them in sugar. The best part of it all is that these are so easy to make, it's downright embarrassing. You need this recipe in your back pocket/up your sleeve/wherever on your person you keep your recipes...I promise.

Also, you're welcome.

The Easiest Peanut Butter Cookies known to mankind


1 cup peanut butter (general convention states that you should only use highly artificial peanut butter for baking (i.e. Skippy, Jif, etc), but I used natural and it turned out wonderfully)
1 cup sugar
1 egg

Preheat oven to 350.

Stir ingredients together in a bowl until combined. Shape into balls. Roll in more sugar and do that criss-crossy thing with a fork or throw some chocolate chips in the dough. We love it all.

Place on parchment lined cookie sheets and bake 8-10 minutes, definitely depending on how big you made the cookies in the first place. They should be just starting to brown on the bottom. If they start browning on top, they'll turn out crunchy and not chewy (and everyone knows that peanut butter cookies should be chewy, not crunchy. Am I right?!)


And cue the doggie in her perfectly pink party dress! Go big or go home, people.

Wednesday, August 18, 2010

risotto with roasted vegetables

Hello friends of Stephers,
I am Cinr/Cinders/CC/Cindy/... I guess I go by anything.

In college, Steph and I shared an affinity for Italian, and in summer 2005 I had the great fortune of spending the summer in the most wonderful place, Florence, Italy.

As a poor college student living on loans and a part-time job, I had little money to go out to eat. To go to Italy and not have tons of money to spend on delicious food, this is a food crime. However, one food I did get plenty of, compliments of the hotel we were staying at, was risotto.

Before summer 2005, I had not the slightest idea what risotto was and the first time they served it I was in shock. Excuse me, this is Italy, shouldn't you be serving me pasta everyday? Rice? Has Italy recently been taken over by Asians because this just does not make sense to me.

Remember, I was young and ignorant at the time so don't judge me too harshly.

It has now been five years since that splendid summer of risotto and I haven't had much of it since then. As I was flipping through my cookbooks deciding on what to contribute to this blog, I saw page after page of risotto recipes and nostalgia took over.

The recipe used comes from a Perfect Italian cookbook by Parragon Publishing
Ingredients
Serves 4
5 cups simmering chicken stock - I substituted for 4 cups of chicken broth and 1 cup of water
1 tbsp olive oil
3 tbsp butter - we only used 2 tbsp
1 small onion, finely chopped
1 3/8 cups (10 oz.) risotto rice
8 oz of roasted vegetables - we went with red and green bell peppers and added a little bit of garlic
3/4 cup (3 oz.) grated Parmesan cheese - after going to the TJ's to buy this ingredient this morning I forgot to use it *sigh*
salt and pepper
2 tbsp finely chopped fresh herbs - basil from my new kitchen plant

Method
Start off by heating the stock/broth in a pot. Once it has boiled, bring it down and continue to have it simmer. You'll be adding this gradually to the risotto in a bit.

Heat the oil and 2 tbsp. butter in a "deep pan" over medium heat. When the butter is melted add the onions. Once the onions have acquired a nice golden color (if they are brown, you cooked them for too long), reduce the heat and add the rice. Mix to coat the rice in oil and stir constantly for 2-3 minutes, or until the grains are translucent.

At this point you will gradually add the stock/broth you have had simmering on the stove top. I used a ladle to add while my wonderful friend and neighbor, Melly, stirred the rice. This is a long process (15-17 minutes) of adding the stock and then stirring, and as the broth is absorbed by the rice you add more. I recommend having a friend there share in the experience because it will help the time pass faster, but make sure you are paying attention not to overcook the rice or to drown it in broth.


We didn't use all the broth, so don't feel like you have too. There was 1/3-1/2 cup left over when we finished. Once you have finished adding the broth, add the vegetables.


Make sure there is still some broth left because after you add the vegetables you'll cook it for another 5 minutes. We cooked it for 6 minutes, just waiting for the broth to absorb enough to make the risotto creamy and not drowning.

At this point you can add 1 tbsp. butter, mix well, and then sprinkle in the Parmesan until it melts. We didn't partake in this final step mostly because I forgot, tehehe, but despite that the risotto turned out delicious.


Looks good AND tastes good.

Well, it's been nice visiting, I hope we do this again sometime.

Monday, July 19, 2010

what the %@$# is cobbler?

Um...hi, friends. Sorry you had to see that.

Anyway, it is summer now, full-blown summer. Triple-digits-every-day summer, walk-around-outside-for-10-minutes-and-get-an-awesome-flip-flop-tan summer, don't-forget-to-wear-deodorant-SERIOUSLY summer. Ah, summer. I love, love, love, love summer.

Guess what else happens in summer? If you said "ginormous $10 flats of peaches!", you are right on. And do you know what happens when the speed at which those peaches are ripening is greater than the speed at which you can cram said peaches into your mouth?


The answer, dears, is peach cobbler.

The problem, dears, when you try to put action to words, is that there is no clear definition of what cobbler actually is. In my mind, it is supposed to look like this, but the kind I've had more looks more like this. And here is a hilarious tale of one woman's quest to define it. Biscuit-like topping or batter surrounding fruit? Some even insist that it must be double-crusted. (Shudder. No. That's a pie.) (To further complicate your life, there also exist fruit desserts in the form of crisps, crumbles, slumps, grunts, buckles, bettys, pandowdys, clafoutis, fools, sugar highs, and headaches.)

This weekend I opted for the batter version. Kind of a cop-out because I really do think that biscuit-top cobbler is the real thing, but I found the batter version scribbled down on a card somewhere in the house. It also closely resembles PW's rendition. Further awesomeness.


This little cobbler went to Alameda.


Friends, any way you assemble it, I promise that this is good! (And it is MANDATORY that you top it with vanilla ice cream. You heard me. Mandatory! Yes, you are responsible for this material for the exam.)

Peach Cobbler


1 stick butter, melted and slightly cooled
1 1/4 cups + more sugar
1 cup self-rising flour (can substitute 1 cup all purpose flour + 1 1/2 teaspoon baking powder + 1/2 teaspoon salt)
1 cup milk, room temperature
(at least) 4 cups peaches, peeled and cubed (or enough to cover the bottom of your baking dish + a little bit more)

Preheat the oven to 350. Butter or spray a baking dish. (You can use a 9x13 dish for a thinner cobbler or a smaller dish for a thicker one.)

Combine the cubed peaches in a bowl with a tablespoon of sugar and let sit. This will help get them all syrupy and yummy.

In a medium bowl, whisk together 1 cup of the sugar, the flour, and the milk. Whisk in the melted butter. Batter should be on the thin side and very smooth.

Pour the peaches into the baking dish. Pour the batter on top of them. Sprinkle 1/4 cup sugar over the top.

Bake for an hour or so. (A 9x13 pan should take about that long, a smaller pan will need more time.) 10 minutes before it's done (just starting to brown), take out the pan and sprinkle another tablespoon or two of sugar or so over the top. You want it to be crunchy, people.

When it reaches golden brown status and smells amazing, you have yourself a peach cobbler! Awesome! Smother with ice cream.

Monday, June 28, 2010

too much of a good thing

is a really, really good thing. Last week combined two of my favorite things: baking and wedding (and baking for a wedding)! Oh, and birthday: the mid-20s have officially arrived, and I'm a little frightened but resolving to deal with it.

Wedding baking part 1: horseshoe palmiers


Yeah, these did not turn out as planned. I need me some Dufour Pastry to make these the proper, buttery way.


Despite the fact that they look like rapidly unraveling butterflies, Sammy wants in all the same.


Here's part 2: mini chocolate cupcakes with salted caramel frosting. Whereas part 1 was mostly failure, part 2 was mostly success, minus the repeat incident of neglecting to add sugar to the chocolate cake. Twice in four months?! Someone needs to revoke my hypothetical chocolate cupcake baking license. At any rate, batch #2 turned out just fine, and the salted caramel frosting was super yummy salty-sweet goodness.

Mascarpone brownies also emerged from the oven this week, as did berry buttermilk cake and oatmeal chocolate chip cookies. What can I say? When baking for important events, you want to pull out the very best (which occasionally makes your kitchen look like this)


Surprisingly, the most lauded baked good of the week were these...


Mmmmmhmmmm. These coconut bars hit all the right notes: snappy crust, nutty middle, a wonderfully textured topping. A note: the recipe is from America's Test Kitchen, which means that they've already done all the grunt work for you, tweaking the recipe and such. What's written below is practically perfect in every way. Need I say more?

Coconut Pecan Bars
(adapted slightly from The Best of America's Test Kitchen 2010)

Place an oven rack in the middle of your oven and preheat to 350. Line a 9x13 pan with foil and spray with Pam (I used the kind that has flour in it)

crust
2 cups all-purpose flour
3/4 cup packed brown sugar (they call for dark; I used light)
1/2 cup pecans
1/4 teaspoon salt
10 tablespoons butter, cut into cubes and chilled

In a food processor, process the flour, sugar, pecans, and salt until the pecans are coarsely ground, 10-15 seconds. Add the butter and pulse until the mixture looks like coarse meal, 10-15 pulses. Press the mixture firmly into the prepared pan. Bake until golden brown, about 20 minutes. Cool on a wire rack while you make the topping and middle.

topping
1 1/2 cups sweetened shredded or flaked coconut
1 cup cream of coconut (you can find this in the liquor aisle by the stuff used to make pina coladas)

In a smallish bowl, stir together the shredded coconut and cream of coconut.

middle
2 eggs
3/4 cup brown sugar (again they call for dark; I used light)
2 tablespoons all-purpose flour
1 1/2 teaspoons baking powder
1 teaspoon vanilla extract
1/2 teaspoon salt
1 cup pecans, toasted and chopped

In a medium bowl, whisk together the eggs, sugar, flour, baking powder, vanilla, and salt until smooth. Stir in the pecans, then pour the filling over the cooled crust. Dollop spoonfuls of the coconut topping over the top, and attempt to spread it evenly.

Bake until the topping is golden brown, 35-40 minutes. (Inevitably some of it will look kind of patchy and pale, but that's okay. Aim for some dark golden brown patches; that's good enough.) Cool on the same wire rack for 2 hours. Cut into bars and eat!! (These keep remarkably well for a number of days, either at room temperature or in the refrigerator.)

I was especially surprised because I used to hate coconut but I really love it now. Really really. As I referenced in last week's post...don't be surprised if all of a sudden coconut magically appears in your life to solve lots of your problems. The book calls these "dream bars", and for the record...yes, they are dreamy indeed.

Monday, June 21, 2010

fear and loathing in the kitchen

Today I thought I'd talk a little about things that used to scare me.


Frosting cupcakes used to scare me. There is such an intimidating aura built up around them...not for you? Maybe? The fact that I am slightly perfectionistic when it comes to cupcakes could have a little something to do with it. 


But when you plop a huge dollop of frosting on a pretty cupcake...


And then spread it around with an icing spatula...


And then dunk it in coconut...


You're pretty much good to go. 


Then you'll do it again and again and again because it's fun and because people like to eat lime yogurt cupcakes with lime cream cheese frosting. Topped with coconut, of course. Oh, Stephanie from the past...if only you knew what a silly thing it is to fret about cupcakes. When faced with harrowing life questions from now on, I'm going to respond with "coconut". 

What should I be doing with my life? Coconut. What should I wear tomorrow? Coconut. Can I take a nap now? Coconut.

Coconut logic is flawless. 


The last time I wrote about madeleines, I had no camera battery, so showing them to you never happened. I used to loathe making these because they never turned out well. 


But now I can crank them out like an old pro, even early on a Saturday morning. There is no secret, I don't think. Practice is good, extending grace to yourself when mistakes surface is even better. You'll get there!

These cookies freaked me out for a little while as well! They started falling apart a little bit as I was slicing the dough, but a little time spent warming up on the counter should do the trick. Deeply chocolaty and with a salty bite, Dorie's neighbor dubbed these "World Peace Cookies"...he may be on to something here, given that I am sitting here grinning like a fool as I remember how these touch my cookie heart.

World Peace Cookies
(adapted from Baking: From My Home to Yours by Dorie Greenspan)

1 1/4 cups flour
1/3 cup cocoa powder (I used Dutch processed)
1/2 teaspoon baking soda
11 tablespoons butter, softened
2/3 cup brown sugar
1/4 cup sugar
1/2 teaspoon fleur de sel or 1/4 teaspoon fine sea salt
1 teaspoon vanilla extract
5 ounces bittersweet chocolate, finely chopped

Sift the flour, cocoa powder, and baking soda together.

In the bowl of a stand mixer fitted with the paddle attachment (or with a hand mixer), beat the butter until soft and creamy. Add the brown and white sugars, salt, and vanilla and beat for 2 minutes.

Turn off the mixer and dump in the flour mixture. Throw a kitchen towel over the bowl so stuff doesn't go flying everywhere (cocoa powder, while delightful, is unpleasant when inadvertently inhaled) and pulse the mixer maybe 5 times, 1-2 seconds at a time. Take a peek and see if the flour is mostly mixed in.  If so, take the towel off and stir just until the flour disappears. Throw in the chocolate pieces and stir together just briefly.

Turn out the dough onto a surface and gather it into a cohesive ball. Divide in two, then shape each section of dough into a 1 1/2 inch diameter log. Wrap in plastic wrap and freeze for 30 minutes or refrigerate up to 3 days. (You just need the dough to get colder so it'll stay together.)

When you're ready to bake, center a rack in the oven and preheat to 325. Line two baking sheets with parchment paper.

Using a knife, slice dough logs into 1/2 inch thick cookies. If they start falling apart, you can try to warm the logs with your hands or just let them warm themselves up on the counter. Chocolate bits may fall off the cookies; just pat them back in. 

Place on sheets (you can pack them in close; they don't spread much) and bake one sheet at a time for 10-12 minutes. Let cool on baking rack before digging in; they're truly better at room temperature.

I'm pretty sure some of you out there have your own cookie recipes that could bring about world peace (give or take an errant nation or two)...I'm asking (nicely). Please share! You know mine.

Monday, June 14, 2010

fashionably cake

I won't say it was the hardest thing, but definitely one of the sticky points of living in Asia last year was the fact that my baking adventures were limited by our toaster oven (capacity: 6 cookies), a general lack of baking pans in the region (save a gutsy trip Jena made to the other side of town to scavenge for appropriate bakeware for Thanksgiving casseroles), and hardly any measuring cups or spoons (I used the teeny measuring cup that came with our ancient rice cooker--learned later it is not a real American cup, much to my horror). We still managed to bake stuff, but I would inwardly pray/cringe every time I would throw what I hoped was a half-teaspoon's worth of baking powder into some would-be pancakes. "Close enough!" was my motto, although I can't bear to use it now.

So when this raspberry buttermilk cake (RIP Gourmet Magazine) made the rounds last June, I dutifully bookmarked it, but the dearth of berries in Asia prevented me from actually baking it. I promptly forgot about it.


Last week this recipe re-sailed into my life via our weekly CSA newsletter! I just about ran to the farmers' market downtown to get me some berries, vowing to not let another year pass before baking the cake. Berry buttermilk cake...mine mine all mine. Tender and not too sweet, this cake is equally good eaten just out of the oven or while stumbling around the kitchen in the morning searching for the coffee (note: it is in the same place every day; I am just not a morning person). It's almost embarrassingly easy to throw together, a fantastic use of summer berries, and will delight pretty much anyone who is lucky enough to get a slice.


I have a feeling it's going to be showing up on a regular basis all season long.

Berry Buttermilk Cake
(adapted from the June 2009 issue of Gourmet)

1 cup all purpose flour
1/2 teaspoon baking soda
1/2 teaspoon baking powder
pinch of salt
1/4 cup (a half stick) of butter, softened
2/3 cup sugar
1/2 teaspoon vanilla extract
1 egg, room temperature
1/2 cup buttermilk (I squeezed the juice from half a lime into a liquid measuring cup, then added half & half until it reached the 1/2 cup mark and let it sit for 10 minutes until curdly)
1 cup berries of your choice (I used blackberries and strawberries because (gasp!) I do not love raspberries)

Preheat oven to 400. Grease and flour an 8 or 9 inch square or round baking dish.

In a medium bowl, whisk together the flour, baking soda, baking powder, and salt.

In the bowl of a stand mixer fitted with the paddle attachment (or a medium bowl for a hand mixer), cream together the butter and sugar until fluffy, 2 minutes. Beat in vanilla and egg.

Turn the mixer speed to low and add the flour mixture in 3 parts, alternating with the buttermilk (2 parts) (mixing should begin and end on flour). Don't overmix! You want the cake to be tender.

Scrape the batter into your prepared pan, then scatter the berries over the top. (Hint: if you use raspberries, place them so the open part is facing up. This will prevent them from sinking all the way to the bottom. Have not yet figured out how to prevent the other kinds of berries from sinking, but this is purely an aesthetic issue.) Sprinkle an additional 1 1/2 tablespoons sugar over the top for a crunchy crust.

Bake for 20-25 minutes. Cake is ready when golden brown on top and a toothpick inserted in the middle comes out mostly clean. Cool in pan on a wire rack for a few minutes: you can then invert onto a plate or eat out of the pan (the second is my preferred method).

PS: I recently added a list of my favorite food blogs to the right over there, so peruse at your leisure: each is a heavy dose of inspiration for me. 

Monday, May 24, 2010

aunt miriam's tomato chow chow

Hello dear readers,

Jena here, guest blogging from texas.. I was told I needed to introduce myself, so here goes.. I met Stephanie back in 2004 when we first got to berkeley and were both pretty clueless about.. most things. My first memory of Stephanie is meeting her in bible study and seeing her every Friday because we had back-to-back discipleship appointments with the amazing Allison -formerly Lee- Staton. I remember thinking that steph always smelled good and that I probably wasn't cool enough to be her friend. But Oh how things work out better than we could have thought and I have been blessed to call her not only my friend, but my incredible roommate, sister, co-worker and confidante among other things.

When Steph asked me to be a guest blogger for i ate everything, I was a little intimidated, truth be told. But hopefully this will be as entertaining for ya’ll as it was for me!

I was trying to think of something that screamed southern cooking for all of you Pacific-coasters and Mid-westerners, and I think I found it..

Aunt Miriam's Tomato Chow Chow is one of those things I grew up with, and didn’t think twice about eating as a side with my black eyed peas, lima beans and every once in a while on pork chops. The recipe I’ve grown up with is a creation of my Great Aunt Miriam, my Grandma’s twin sister, from Eupora, Mississppi. I hope you enjoy it as much as I do!

So here goes: First, you need to gather up 24 tomatoes.. best if they are fresh and homegrown.. but if you only have 3 tomato plants like we do, you can just use some nice store-bought ones. Dip them in hot water, let cool, and peel the skin off of every one.


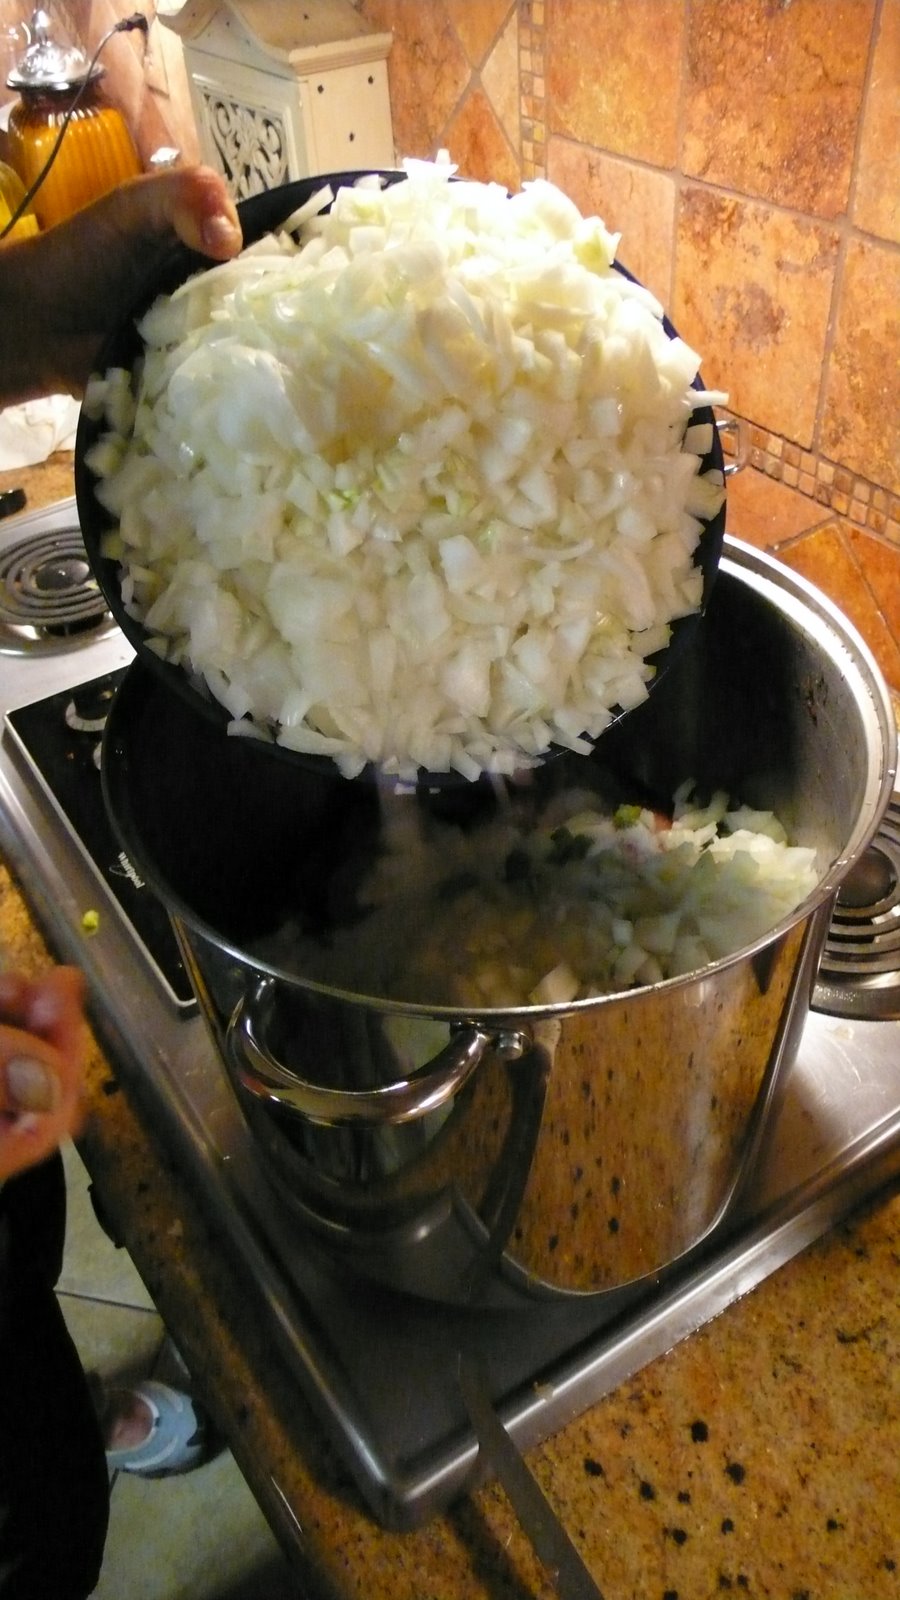
Next, you’ll need 12 medium size onions.. chop them all up in varying sizes. Don’t worry about making them small; they’ll shrink while cooking. It is best to get some help for this one.. Otherwise after 4 onions, you won’t be able to see what you are doing from all the tears!


You can add three chopped green peppers if you want, for a little more flavor.

Get a HUGE pot to cook it all in.. cut your tomatoes over the pot, so you don’t lose all the yummy juices. Then, dump in your green peppers, onions, and a whole 16 ounce jar of hot peppers (drained). You can also use 25-30 fresh hot peppers, but the canned ones are just easier to deal with.


Add in ½ teaspoon of:

Cinnamon, ginger, allspice, dry mustard, cloves, black pepper, and celery seed. 2 Tablespoons of salt, 2 cups of sugar (mmm sweetness), and 1.5 cups of white vinegar.


Cover the pot, and let it cook on medium heat for about 3 hours. At first, you’ll think, “this looks too dry, should I add water?” the answer is no, because after about an hour or 2, you’ll think, “Dude, this looks like soup, when will it thicken up?!” You can take the cover off for the last 45-30 minutes to let the soupy-ness evaporate.


While everything’s cooking, you can start preparing your jars for canning. This recipe will fill up 24 half-pint jars. You can get these at your local supermarket. You can also buy old cool canning jars for interest, you’ll just have to buy new lids so they will seal correctly. Wash everything in warm water and rinse very well.

Once your three hours are up, and your kitchen smells amazing, heat up some water in smaller pots. Just follow the canning instructions that come with your jars, which say to heat the jars, and lids in hot water. They need to be heated so that when you pour the chow chow in, it won’t break the class, but don’t heat the rings, that would make it a little difficult to screw them on!

Fill the jars to ¼ - ½ inch from the top, and wipe the rim clean. Place the lid on top, and screw on the ring in one smooth movement.

The final step is to submerge all your filled jars in boiling water for 40 minutes for the canning process. This is a great time to grab a glass of wine, and relax, because it’s almost done!

Let the jars sit on a towel for at least 12 hours to make sure the seals are good. In the morning, you can take the rings off and test to make sure they are all sealed. If you have any that haven’t been sealed properly, you can just eat those immediately!

I know not everyone will be able to go through this whole involved canning process, so I made a bunch of smaller jars for you guys. If you want a sample, just email me your physical address: jenateresa [at] gmail [dot] com. I would LOVE love love to share this sweet-spicy-tomatoey goodness with you. But you have to promise to eat them with black-eyed peas.. and not say, "I don't eat anything we feed to the pigs" like some people say.

Here's the easy to read/print recipe:

Aunt Miriam's Tomato Chow Chow
Makes approx. 24 half-pint jars

24 Medium size tomatoes - dip in hot water and peel
3 Green peppers - chopped - optional
12 Medium size white onions - chopped
25-30 hot peppers - diced OR whole 16 oz jar pepper rings
1/2 teaspoon of each:
cinnamon
ginger
allspice
dry mustard
cloves
black pepper
celery seed
2 Tbs. salt
2 cups sugar
1-1/2 cups white vinegar

Takes about 3 hours to cook down
(when you fill jars leave at least 1/4" space at top)
Do not use assembly line method - fill one jar, then place lid and screw band on.
lower into boiling water making sure lids are covered for approx. 40 minutes.
Remove jars and cool 12 hours. Remove bands and test lids by pushing on top and trying to remove lid - if not easily removed, it is OK.

Yay! this was fun. Thanks Stephanie, for the opportunity to share this with all of you!
don't forget to send me your addresses!

Monday, May 17, 2010

flashbacks

We're going to do a little nostalgic thinking today, all the way back to the year 1996. What were you wearing/doing way back then? I remember sporting the unfortunate combination of glasses and braces, ginormous sweatshirts over leggings, and a perm (?) (if memory serves me right). I was head-over-heels in love with the US women's gymnastic team (I know you remember them too). Like every other 10 year old, pizza was my favoritest food EVER.


(This version from last week: Deb's dough, hot + mild sausage, prosciutto, green garlic, red onion, mushrooms, burrata and fresh mozzarella, basil. Note: burrata is way too watery to use for pizza. Note #2: chances are, I would not have liked this pizza in 1996. My pizza of choice was just like every other 5th grader: pepperoni surrounded by gobs and gobs of cheese. Non-watery cheese, may I add. Note #3: I need to get over my fear of baking with yeast.)

It was also around this time that e-mail and the world wide web came to the common folk in the form of AOL...loved that. And while we're in la-la land circa 1996, remember that ubiquitous e-mail forward that viciously circled around in the form of revenge on Neiman-Marcus for their $250 cookie recipe trickery? Turns out the story is false (an untrue forward?! Is this even possible?), but 14 years ago it felt good to stick it to the Neiman-Marcus man and send that darn outrage of a story to every single person I knew. 14 years later, it feels so good to taste what all the fuss was about.


I am not going so far as to say that these cookies are worth the purported $250, but goodness. Look at these guys. I'm usually pretty ambivalent about nuts in cookies, but the walnuts here round out the texture and make them soooooo great. Also, the copious amount of oatmeal used means you can kind of trick yourself into thinking that these are healthy for you... hello, whole grains! My zeal for whole grains must have been why I thought I should make eleventy-hundred cookies. Seriously, this recipe makes eleventy-hundred cookies (which is why I have a ton of cookie dough in the freezer. PS to my socal road trip buddies in 2 weeks: you better believe these cookies are coming for you.)


Oatmeal Chocolate Chip Walnut Cookies (aka the Neiman-Marcus cookies)
(I don't know to whom I should attribute this recipe, but I will give credit to Caroline's post for getting my butt in the kitchen)

5 cups oatmeal
2 cups butter, softened
2 cups white sugar
2 cups brown sugar
4 cups flour
2 teaspoons baking soda
2 teaspoons baking powder
1 teaspoon salt
4 eggs, room temperature
1 tablespoon vanilla extract
4 cups chocolate chips (I used a lot less)
3 cups nuts (I used walnuts), chopped

Preheat oven to 375. Line a couple baking sheets with parchment paper.

In a food processor or blender, blend the oatmeal until powdery. In a separate bowl, whisk the pulverized oatmeal with the flour, baking soda, baking powder, and salt.

In the bowl of a stand mixer fitted with the paddle attachment (or with a hand mixer), cream together the butter, white sugar, and brown sugar. Add the eggs and vanilla; blend well. Gradually stir in the flour mixture; listen to your stand mixer scream bloody murder due to the enormous amount of dough you are forcing it to mix. Stir in the chocolate chips and nuts (I like chopping them in the food processor right after the oatmeal) (the recipe also says to grate an 8 oz. bar of chocolate into the dough at this point, but Mr. Stand Mixer screamed, "Enough is enough!", so I gave him a reprieve. (He's very temperamental.)

Roll into balls, place on cookie sheets, bake for 8-15 minutes (depending on how big you make them). Just check--when the tops start to turn golden, they're done. Let cool on the sheet for a minute before digging in!

And for freezing the dough: roll into balls, freeze on a plate or other large flat surface until really cold, then transfer to Ziploc bag (this process ensures the dough balls won't stick to each other when you're dying for freshly baked cookies in the near future).

I'll be in Chicago next weekend (my former co-love is cooking partner Lisa is getting hitched!), so my girl Jena will be guest blogging! Hooray! She's pretty much amazing, so get excited!!

Monday, April 12, 2010

son of a cream puff

First: the new face of cooking shows...you won't be sorry if you watch the entire ten minutes. Trust me on this.


(Note: chocolate chip cookie baking in my kitchen bears more than a slight resemblance to this video. Minus the gratuitous chocolate chip cramming in mouth part in the middle. Just kidding to both points. Although if you see me throwing my eggshells on the floor instead of in the trash can from now on, you know why.) (Favorite line at 2:51..."son of a biscuit", which I am totally going to start saying instead of, well you know. Not that I say that anyway. I hereby pronounce this little girl Sass Queen 2010.)

Where was I? Baking...the past week...oh yes. Our home hosted an "Iron Chef" competition last Thursday, which was messy good fun. 1 kitchen, 8 people, 2 teams, 2 bags of unknown groceries, 7 final dishes comprising 1 gut-busting meal. At the risk of sounding horribly bossy, I strongly suggest that you call up your friends now and set a date (this week?) for your own cooking party, competition optional. (This was way more enjoyable than I thought it would be!)

Random ingredient usage highlights: dried mango slices transformed into a cinnamon/nutmeg chutney? compote? of sorts, starfruit smashed into lemon vinaigrette for salad, stealing greens from the salad for pesto (remember, all's fair in love and pesto).

Of course I made dessert...the day before. (Loads of prior history dictates that dessert never be made in a hurry.) I will not bore you with the sordid details of my spotty record of successful pate a choux baking; just know that the record was spotty. But what to do with a dessert request--ignore it? Deny it? I swallowed my choux pastry fears and hopped to it.


A profiterole, if you've never had one before, is like the child of the cream puff...a beautiful, tiny, smothered in chocolate sauce cream puff child. Oh lordy. They're both made from choux pastry, which are those balls you see up there: dry and crusty on the outside, light and airy on the inside. Basically, a perfect vehicle for whipped cream (cream puff) or ice cream and chocolate sauce (profiterole). Relatively easy and super impressive. (Note: do not try to serve any more than two apiece to a person after an extremely large meal. Mild curse words may be tossed your way.)


Profiteroles
(adapted from Joy of Baking--this recipe is enormously informative and useful. Read the top part through; it'll tell you everything you need to know!)

1/2 cup all purpose flour
1/2 teaspoon sugar
1/4 teaspoon salt
1/4 cup butter
1/2 cup water
2 eggs, lightly beaten

Preheat oven to 400 and position a rack in the center of the oven. Line a baking sheet with parchment paper.

In a medium bowl, sift together the flour, sugar, and salt.

In a heavy saucepan over medium heat, melt together the butter and water and bring to a boil. Remove from heat and add the flour mixture all at once. Returning to heat, stir vigorously with a wooden spoon until the mixture forms a smooth ball.

Transfer dough to the bowl of an electric mixer and with the paddle attachment, beat on low for a couple minutes to cool down the dough. (Alternately, beat on low with a hand mixer.) With the mixer still running, slowly stream in the eggs and continue beating until dough turns into a smooth paste. (It will look a little curdled and scary for a bit, but don't worry, just keep going.)

Spoon 12 mounds of dough onto the sheet (I found my medium sized cookie scoop worked great for these purposes). (You could also pipe it onto the sheet, but I would never ask you to do this.)

Bake for 15 minutes, then turn the oven temperature down to 350 and bake for another 30-40 minutes until the exterior of the little puffs are golden and the interior fairly dry. (To check, just slash one open and check.) Turn off the oven and leave the door slightly open for 10-15 minutes to let the puffs dry out, then remove from sheet to a cooling rack for an additional 5-10 minutes.

To serve, you can reheat them in a 350 degree oven for 5 minutes, then split open and fill with little scoops of vanilla ice cream. Drizzle warm chocolate sauce over the tops (or just make a pool of it on the plate) and be generous with it, please.

Okay so exciting: my very first cake decorating class starts tomorrow! You will definitely be reading all about it here, so get amped!!

Tuesday, April 6, 2010

frosting war and peace

Hi! I'm back. Hello. I missed you guys! First off, a big thanks to Aubrey for an amazing peek into her world last week! My heart...it smiled and ached at the same time seeing photos of the national treasure otherwise known as la mian. And the gai fan. Oh my. I will stop now, but you should seriously go check it out if you haven't already.

Okay. So...what have I been doing the past two weeks? There was a test that went well enough. Not too many brain cells were obliterated by it, so hooray for that.

Also...entrepreneurship! (Fancy label for: Arijaan and her fam hosted their very first Easter Egg hunt on Saturday and asked me to bake stuff and sell it there! Thank you Bulks by the way; it was super fun!) There were some technical difficulties the day beforehand, most prominent being THE ONE WHERE THE WATER GOT TURNED OFF ALL DAY, one thing led to another, and all of a sudden I was standing in the middle of the kitchen at 11 pm Friday night, thinking about the acts of God it would take to produce the cupcakes and their frosting and brownies and snickerdoodles and banana muffins I had planned on making for the kiddies of Oakdale by morning with my sanity (fairly) intact.


Around 2 am is when things got sticky. For reasons only an unhinged, sleep-deprived brain could understand, I decided to be ambitious (WHY???) and make French buttercream frosting. Things turned ugly and catastrophic in the way that only overly earnest undertakings far too late at night go. Something about a soft ball stage, way too many egg yolks, and...the cause was lost long before I even separated the first egg. I should have known. Frosting attempt #2 was also a bust. Panicked, I started frantically flipping through the 10+ cookbooks I dragged into the kitchen for a Hail Mary pass at frosting redemption.


The short version: I found it (or should I say I caught it? I threw it? Sports analogies escape me), breathed an immense sigh of relief, slathered everything in sugar and even managed to get an hour of sleep in. Your take-home messages:
  • Don't mess with French buttercream in the wee hours of the morning. It will only lead to pain.
  • Make sure that thing in your kitchen drawer that you thought was a candy thermometer is not actually a meat thermometer. 
  • Always have a reliable frosting recipe in your back pocket (and the supplies to make it happen). 
  • Also...sprinkles cover over a multitude of sins. Amen.

The Chocolate Frosting that saved the day
(adapted from Absolutely Chocolate) (one glimpse at this book elicits a very Pavlovian drooling response from me)

1 1/2 pounds chocolate (I used a mixture of milk, dark, and whatever else I could scrape together), chopped
6 tablespoons butter, cut into small pieces
4 1/2 teaspoons instant espresso powder (optional, I left this out because it was for kids)
pinch of salt
1 cup + 2 tablespoons heavy cream
3 teaspoons vanilla

Put the chocolate, butter, espresso powder, and salt in a large bowl. Bring the cream to a boil on the stovetop and pour it over the chocolate stuff. Stir until everything is melted and smooth. Stir in the vanilla. Refrigerate until cold (at least 2 hours). (Longest 2 hours of my life.) Beat frosting with a hand-held mixer (will be kind of hard at first but should soften up with more beating). Frosting will lighten in color and become more spreadable. Frost your (cup)cakes of choice and smile because that was not difficult at all!

Your most memorable kitchen failure?

Monday, March 22, 2010

don't mess with texas (sheet cake)

Yet another layer of Stephanie for your perusal and enlightenment: I have this not-so-secret love for the South. If I had things my way, I would pick up today and move there. No, I'm serious. In this dream sequence, I'd be walking down the street, spring in my step, and an adorable Southern born-and-bred grandmother would take pity on this poor Yankee and swoop me up in her arms and into her kitchen, where I would proceed to feast on and learn the secrets of making authentically scrumptious biscuits and fried chicken and pecan pie. Then we'd talk deep (the merits of lard vs butter vs shortening, is Real Cornbread necessarily unsweet, chili--beans or no beans? or How many syllables does the word "grits" really contain?) while sitting in rocking chairs on her porch and drinking sweet tea as we played with a giant checker set...whoops, the fantasy just descended into a Cracker Barrel experience. The daydreams can be overwhelming sometimes, but I mean it, I am a really good candidate for Southern living. I could learn to like country music, I'll start talking like y'all, saying "icin'" instead of "frosting" and "dressin'" instead of "stuffing", and I already really, really love butter. If you are at all interested in sponsoring my dream...we should meet up. Seriously.


All earnestness aside, this past week I was faced with a challenge: dessert for 50 men, on the cheap. Cupcakes were immediately eliminated (too cutesy), as were ice cream cookie sandwiches (did them in the fall). After a thorough rifling through recipe files and cookbooks, I saw two good looking chocolate cakes from a book and a blog that I was trying to decide between, but upon closer inspection they (conveniently) seemed to be virtually the same thing: Texas sheet cake.

Of course it was from Texas. Those sassy folks think their state deserves to be its own country (and to which I say...take me with you)! Maybe this is a little audacious to put out there, but if I were in charge of these kinds of things (and let's pray that one day this actually happens), I would grant them independence based on this cake alone, provided I was supplied with a regular collection of Texas sheet cake battered spatulas. It's that good, and even better than good: ain't nothin' dainty or fussy about this cake. Slap it together, pour on the frosting, zero to delicious in 30 minutes! (Well, give it a little longer for the frosting...I mean icin' to set.) Cut yourself a big slice (remember its namesake!), top it with some nice ice cream, and sit in your rocking chair on your porch as you talk deep with your imaginary adopted Southern grandmother. Daydreams are nice and all, but take it from me: this cake is best eaten for real.


(PS...I made 4 of these cakes and I'm still not tired of them. Is that not compelling enough for you?! I'll bring the sweet tea; meet you out back!)


Texas Sheet Cake
(adapted from The Pioneer Woman Cooks and Homesick Texan)

cake
2 cups flour
2 cups sugar
1/4 teaspoon salt
1 cup (2 sticks) butter
4 heaping tablespoons cocoa powder
1 cup boiling water
2 eggs
1/2 cup buttermilk
1 teaspoon baking soda
1 teaspoon vanilla
1 teaspoon cinnamon (optional)

Preheat the oven to 350. Find your baking sheet (should have a little lip and be just deep enough for a thin layer of cake). A jelly roll pan or a 13x9 baking pan will also suffice.

Whisk the flour, sugar, and salt together in a large bowl.

In another bowl, combine the eggs, buttermilk, baking soda, vanilla, and cinnamon (if you want).

Over medium-low heat, melt the butter on the stove. When it has melted, whisk in the cocoa powder and add the water.

Pour the butter/chocolate mixture over the flour/sugar mixture and stir briefly to cool down the chocolate a little (so it won't scramble the egg mixture). Then pour in the eggs and give the batter a few good stirs with your wooden spoon until smooth.

Pour the batter in your pan of choice, spreading it evenly. Bake for 20 minutes (for a sheet pan) or 30ish minutes (for a 13x9 pan, and I'd also recommend upping the temperature to 375-400 as well if you're using something smaller than a sheet pan). While the cake bakes...icing time!

icing
something between 1 1/3-2 sticks butter (I'd be lying if I said the 2 stick butter icing wasn't superior...because it totally was! Plus there's the thrill of using up an entire pound of butter for a cake. But if in case you wanted to know...yes, you could use less butter, and it'll still come out fine.)
4 heaping tablespoons cocoa powder
6 tablespoons milk
1 teaspoon vanilla
1 teaspoon cinnamon (again, optional)
1 lb. powdered sugar 
3/4-1 cup finely chopped pecans (PEA-cans are the most Southern nut, confirm/deny)

Much like last time...melt the butter over medium-low heat. When it has melted, whisk in the cocoa powder. Add in the milk, vanilla, cinnamon (if you want). Dump in that glorious pile of sugar and whisk some more. Finally, mix in the pecans. (If you don't use nuts for allergy/etc reasons, make sure to whisk the icing extra well, since the nuts help to break up the sugar lumps.)

When the cake is done, immediately pour the dreamy icing over the top of the cake (it should spread itself quite nicely but may require a little extra help from you). Do your best to let the icing set a little. Just a little. That's all the icing asks of you.

Also...I am super happy to announce that next week I Ate Everything will have its first guest blogger! So fun, right? Be nice to her; she'll introduce herself next time as I will be tied up, enduring one of the inescapable joys in life...standardized testing. Completely unfabulous. See you in two weeks!