Monday, June 28, 2010
too much of a good thing
Wedding baking part 1: horseshoe palmiers
Yeah, these did not turn out as planned. I need me some Dufour Pastry to make these the proper, buttery way.
Despite the fact that they look like rapidly unraveling butterflies, Sammy wants in all the same.
Here's part 2: mini chocolate cupcakes with salted caramel frosting. Whereas part 1 was mostly failure, part 2 was mostly success, minus the repeat incident of neglecting to add sugar to the chocolate cake. Twice in four months?! Someone needs to revoke my hypothetical chocolate cupcake baking license. At any rate, batch #2 turned out just fine, and the salted caramel frosting was super yummy salty-sweet goodness.
Mascarpone brownies also emerged from the oven this week, as did berry buttermilk cake and oatmeal chocolate chip cookies. What can I say? When baking for important events, you want to pull out the very best (which occasionally makes your kitchen look like this)
Surprisingly, the most lauded baked good of the week were these...
Mmmmmhmmmm. These coconut bars hit all the right notes: snappy crust, nutty middle, a wonderfully textured topping. A note: the recipe is from America's Test Kitchen, which means that they've already done all the grunt work for you, tweaking the recipe and such. What's written below is practically perfect in every way. Need I say more?
Coconut Pecan Bars
(adapted slightly from The Best of America's Test Kitchen 2010)
Place an oven rack in the middle of your oven and preheat to 350. Line a 9x13 pan with foil and spray with Pam (I used the kind that has flour in it)
crust
2 cups all-purpose flour
3/4 cup packed brown sugar (they call for dark; I used light)
1/2 cup pecans
1/4 teaspoon salt
10 tablespoons butter, cut into cubes and chilled
In a food processor, process the flour, sugar, pecans, and salt until the pecans are coarsely ground, 10-15 seconds. Add the butter and pulse until the mixture looks like coarse meal, 10-15 pulses. Press the mixture firmly into the prepared pan. Bake until golden brown, about 20 minutes. Cool on a wire rack while you make the topping and middle.
topping
1 1/2 cups sweetened shredded or flaked coconut
1 cup cream of coconut (you can find this in the liquor aisle by the stuff used to make pina coladas)
In a smallish bowl, stir together the shredded coconut and cream of coconut.
middle
2 eggs
3/4 cup brown sugar (again they call for dark; I used light)
2 tablespoons all-purpose flour
1 1/2 teaspoons baking powder
1 teaspoon vanilla extract
1/2 teaspoon salt
1 cup pecans, toasted and chopped
In a medium bowl, whisk together the eggs, sugar, flour, baking powder, vanilla, and salt until smooth. Stir in the pecans, then pour the filling over the cooled crust. Dollop spoonfuls of the coconut topping over the top, and attempt to spread it evenly.
Bake until the topping is golden brown, 35-40 minutes. (Inevitably some of it will look kind of patchy and pale, but that's okay. Aim for some dark golden brown patches; that's good enough.) Cool on the same wire rack for 2 hours. Cut into bars and eat!! (These keep remarkably well for a number of days, either at room temperature or in the refrigerator.)
I was especially surprised because I used to hate coconut but I really love it now. Really really. As I referenced in last week's post...don't be surprised if all of a sudden coconut magically appears in your life to solve lots of your problems. The book calls these "dream bars", and for the record...yes, they are dreamy indeed.
Monday, June 21, 2010
fear and loathing in the kitchen
I'm pretty sure some of you out there have your own cookie recipes that could bring about world peace (give or take an errant nation or two)...I'm asking (nicely). Please share! You know mine.
Monday, June 14, 2010
fashionably cake
So when this raspberry buttermilk cake (RIP Gourmet Magazine) made the rounds last June, I dutifully bookmarked it, but the dearth of berries in Asia prevented me from actually baking it. I promptly forgot about it.
Last week this recipe re-sailed into my life via our weekly CSA newsletter! I just about ran to the farmers' market downtown to get me some berries, vowing to not let another year pass before baking the cake. Berry buttermilk cake...mine mine all mine. Tender and not too sweet, this cake is equally good eaten just out of the oven or while stumbling around the kitchen in the morning searching for the coffee (note: it is in the same place every day; I am just not a morning person). It's almost embarrassingly easy to throw together, a fantastic use of summer berries, and will delight pretty much anyone who is lucky enough to get a slice.
I have a feeling it's going to be showing up on a regular basis all season long.
Berry Buttermilk Cake
(adapted from the June 2009 issue of Gourmet)
1 cup all purpose flour
1/2 teaspoon baking soda
1/2 teaspoon baking powder
pinch of salt
1/4 cup (a half stick) of butter, softened
2/3 cup sugar
1/2 teaspoon vanilla extract
1 egg, room temperature
1/2 cup buttermilk (I squeezed the juice from half a lime into a liquid measuring cup, then added half & half until it reached the 1/2 cup mark and let it sit for 10 minutes until curdly)
1 cup berries of your choice (I used blackberries and strawberries because (gasp!) I do not love raspberries)
Preheat oven to 400. Grease and flour an 8 or 9 inch square or round baking dish.
In a medium bowl, whisk together the flour, baking soda, baking powder, and salt.
In the bowl of a stand mixer fitted with the paddle attachment (or a medium bowl for a hand mixer), cream together the butter and sugar until fluffy, 2 minutes. Beat in vanilla and egg.
Turn the mixer speed to low and add the flour mixture in 3 parts, alternating with the buttermilk (2 parts) (mixing should begin and end on flour). Don't overmix! You want the cake to be tender.
Scrape the batter into your prepared pan, then scatter the berries over the top. (Hint: if you use raspberries, place them so the open part is facing up. This will prevent them from sinking all the way to the bottom. Have not yet figured out how to prevent the other kinds of berries from sinking, but this is purely an aesthetic issue.) Sprinkle an additional 1 1/2 tablespoons sugar over the top for a crunchy crust.
Bake for 20-25 minutes. Cake is ready when golden brown on top and a toothpick inserted in the middle comes out mostly clean. Cool in pan on a wire rack for a few minutes: you can then invert onto a plate or eat out of the pan (the second is my preferred method).
PS: I recently added a list of my favorite food blogs to the right over there, so peruse at your leisure: each is a heavy dose of inspiration for me.
Monday, June 7, 2010
the one in which stephanie is too tired to think of a clever title
Once upon a time (aka last weekend) I baked 8 dozen cupcakes. Just so we're clear: the most I've ever done, ever. They were all for a newly minted 4 year old. Her party was Little Mermaid-themed, which was funny to me because when I was 4 (almost 20 years ago...okay you can stop doing the math now) the movie had just come out, and I spent my days combing my hair with a fork and wishing I could grow a green tail. Oh, how times have changed.
The specs: chocolate cake (the Dutch cocoa makes it look almost black!), vanilla Swiss meringue buttercream frosting. After frosting les cupcakes, I was out a Costco-sized block of butter (that's 4 pounds!) and 28 egg whites. Meaning...I have 28 egg yolks hanging out in the fridge, doing their thing. Help? I can only feed so much creme brulee and tiramisu and lemon curd to the people around me before they start screaming "Are you trying to kill me?" every time I accost them with something egg yolky. Suggestions for anything else that uses up copious amounts of egg yolks?
The cupcakes hung around in cute cupcake trees for a while. Flounder and Sebastian, I regret to inform you that you are about to be tossed on the ground by a hungry preschooler. It happens.
Birthday girl attacks her cupcake. Within a matter of mere mouthfuls, she reached for her second one. (See what I mean about choosing two cupcakes over one?) A girl after my own heart, I say.
Sorry this is short. (It's Saturday) and I need to go lay down. 96 cupcakes can really take it out of you. It doesn't help that I woke up at 5 am in a cold sweat--I had dreamt that someone had stolen my frosting! I know, the thought is insane. And now I've told you the content of 95% of my dreams. I should go.
Thursday, June 3, 2010
life is like a tree of cherries/truck of tacos/box of cupcakes
- Don't cry over split cherries.
- I'm a really fast cherry picker.
- Cherries from other peoples' trees can taste even better than the ones from my own...especially when obtained for the low low price of free. (All of these have been earthshattering for you, I hope.)
And now...onto LA! Yeah...I totally went to LA last weekend and yeah...it took me until now to write about it. Don't be angry; look at these pretty pictures instead!
After stumbling around Venice Beach for what seemed like 50 billion hours with grumbly tummies, this truck appeared like a mirage. Taco truck! we cheered. Upon closer investigation...it was the Flying Pig Truck which specializes in Asian inspired taco heaven. HEAVEN, I tell you!
My pick, a pork belly bao. OH. GOSH. Note to self: should probably ease up a little on the pork belly. Ate it thrice over the course of the weekend...oh wait, THERE'S NO SUCH THING AS TOO MUCH PORK BELLY. I apologize. And I will never let up on the pork belly.
I think this was spicy pork. Mmmm...hi cute taco.
(Has this post gotten too long? Does it look like I care?) Round #685: cupcake wars. We pitted Sprinkles against Crumbs...and giant cupcake came out to play. Just kidding. We totally didn't get this one. But really, how cute is it?!)
We took them to a park across the street, and the showdown began.
Crumbs red velvet cupcake (and Oreo cupcake to the right).
Sprinkles dark chocolate cupcake...I want to marry this cupcake. Please? I will be good to you, I promise. We could live in Beverly Hills right by the motherland...
The aftermath. Sprinkles won, in case you were wondering. For me, it was barely a contest.
Last stop: ramen in Little Tokyo at Daikokuya. Check out the steam mysteriously occluding a clear view of the bowl. A nice savory last note to balance out the extreme cupcake madness from the previous day.
PS: Jena, thanks so much for guest blogging last week!! By the way, if you thought she was joking about sending chow chow to you, she's totally not. Get your addresses in quick before it's all gone!
Monday, May 24, 2010
aunt miriam's tomato chow chow
Hello dear readers,
Jena here, guest blogging from texas.. I was told I needed to introduce myself, so here goes.. I met Stephanie back in 2004 when we first got to berkeley and were both pretty clueless about.. most things. My first memory of Stephanie is meeting her in bible study and seeing her every Friday because we had back-to-back discipleship appointments with the amazing Allison -formerly Lee- Staton. I remember thinking that steph always smelled good and that I probably wasn't cool enough to be her friend. But Oh how things work out better than we could have thought and I have been blessed to call her not only my friend, but my incredible roommate, sister, co-worker and confidante among other things.
When Steph asked me to be a guest blogger for i ate everything, I was a little intimidated, truth be told. But hopefully this will be as entertaining for ya’ll as it was for me!
I was trying to think of something that screamed southern cooking for all of you Pacific-coasters and Mid-westerners, and I think I found it..
Aunt Miriam's Tomato Chow Chow is one of those things I grew up with, and didn’t think twice about eating as a side with my black eyed peas, lima beans and every once in a while on pork chops. The recipe I’ve grown up with is a creation of my Great Aunt Miriam, my Grandma’s twin sister, from Eupora, Mississppi. I hope you enjoy it as much as I do!
So here goes: First, you need to gather up 24 tomatoes.. best if they are fresh and homegrown.. but if you only have 3 tomato plants like we do, you can just use some nice store-bought ones. Dip them in hot water, let cool, and peel the skin off of every one.
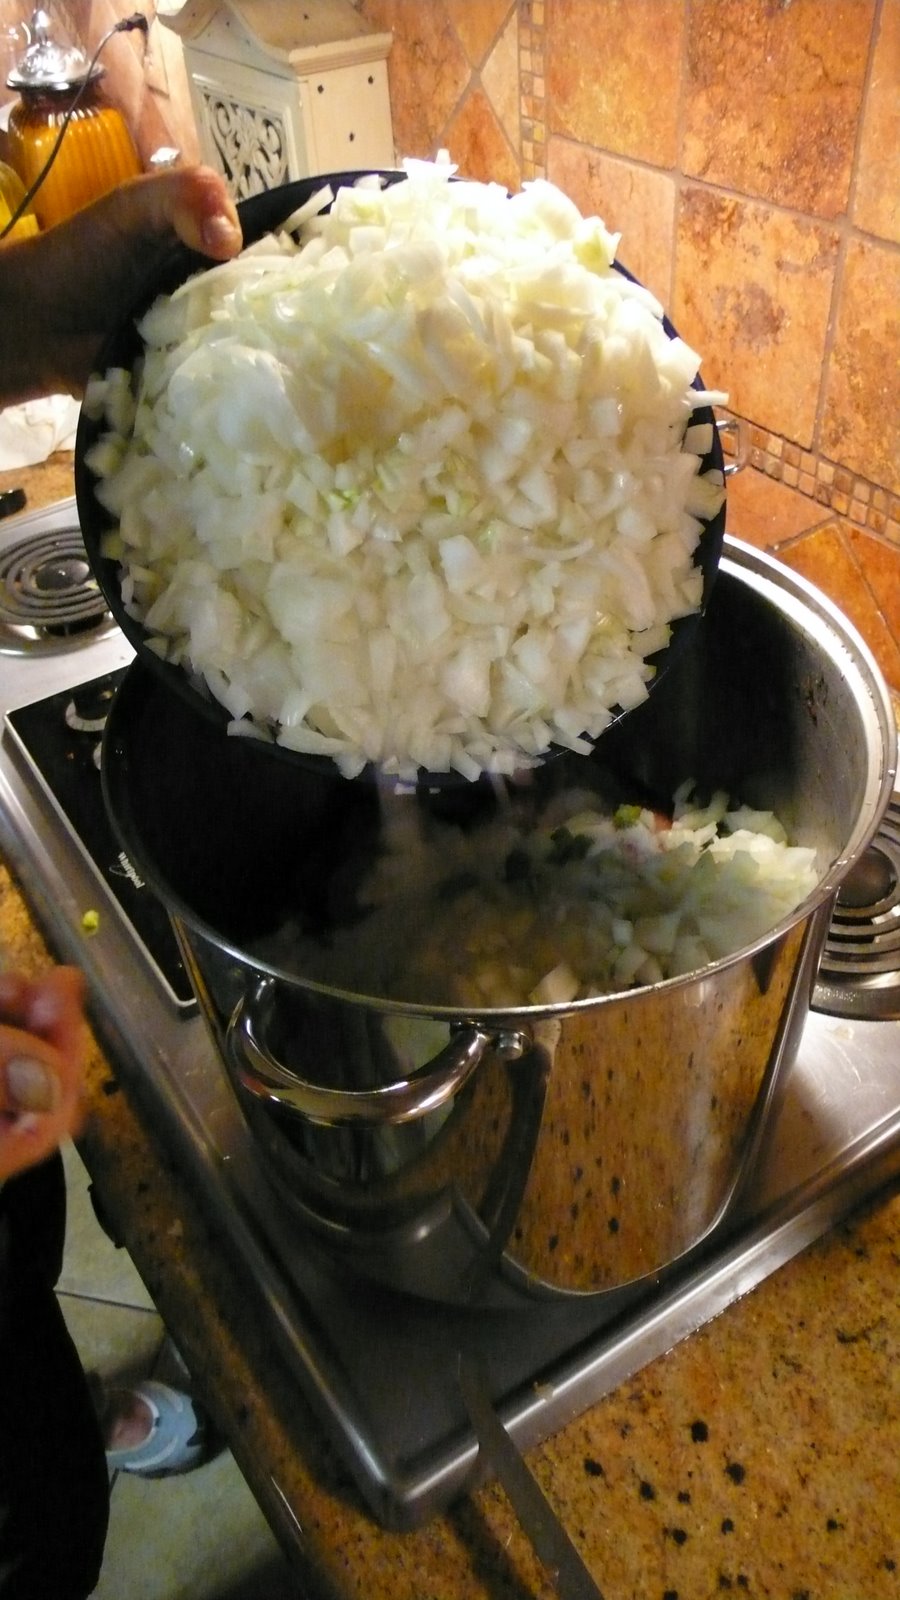
Get a HUGE pot to cook it all in.. cut your tomatoes over the pot, so you don’t lose all the yummy juices. Then, dump in your green peppers, onions, and a whole 16 ounce jar of hot peppers (drained). You can also use 25-30 fresh hot peppers, but the canned ones are just easier to deal with.
Add in ½ teaspoon of:
Cinnamon, ginger, allspice, dry mustard, cloves, black pepper, and celery seed. 2 Tablespoons of salt, 2 cups of sugar (mmm sweetness), and 1.5 cups of white vinegar.
While everything’s cooking, you can start preparing your jars for canning. This recipe will fill up 24 half-pint jars. You can get these at your local supermarket. You can also buy old cool canning jars for interest, you’ll just have to buy new lids so they will seal correctly. Wash everything in warm water and rinse very well.
Once your three hours are up, and your kitchen smells amazing, heat up some water in smaller pots. Just follow the canning instructions that come with your jars, which say to heat the jars, and lids in hot water. They need to be heated so that when you pour the chow chow in, it won’t break the class, but don’t heat the rings, that would make it a little difficult to screw them on!
Fill the jars to ¼ - ½ inch from the top, and wipe the rim clean. Place the lid on top, and screw on the ring in one smooth movement.
The final step is to submerge all your filled jars in boiling water for 40 minutes for the canning process. This is a great time to grab a glass of wine, and relax, because it’s almost done!
Let the jars sit on a towel for at least 12 hours to make sure the seals are good. In the morning, you can take the rings off and test to make sure they are all sealed. If you have any that haven’t been sealed properly, you can just eat those immediately!
I know not everyone will be able to go through this whole involved canning process, so I made a bunch of smaller jars for you guys. If you want a sample, just email me your physical address: jenateresa [at] gmail [dot] com. I would LOVE love love to share this sweet-spicy-tomatoey goodness with you. But you have to promise to eat them with black-eyed peas.. and not say, "I don't eat anything we feed to the pigs" like some people say.
Aunt Miriam's Tomato Chow Chow
Makes approx. 24 half-pint jars
24 Medium size tomatoes - dip in hot water and peel
3 Green peppers - chopped - optional
12 Medium size white onions - chopped
25-30 hot peppers - diced OR whole 16 oz jar pepper rings
1/2 teaspoon of each:
cinnamon
ginger
allspice
dry mustard
cloves
black pepper
celery seed
2 Tbs. salt
2 cups sugar
1-1/2 cups white vinegar
Takes about 3 hours to cook down
(when you fill jars leave at least 1/4" space at top)
Do not use assembly line method - fill one jar, then place lid and screw band on.
lower into boiling water making sure lids are covered for approx. 40 minutes.
Remove jars and cool 12 hours. Remove bands and test lids by pushing on top and trying to remove lid - if not easily removed, it is OK.
Yay! this was fun. Thanks Stephanie, for the opportunity to share this with all of you!
don't forget to send me your addresses!
Monday, May 17, 2010
flashbacks
(This version from last week: Deb's dough, hot + mild sausage, prosciutto, green garlic, red onion, mushrooms, burrata and fresh mozzarella, basil. Note: burrata is way too watery to use for pizza. Note #2: chances are, I would not have liked this pizza in 1996. My pizza of choice was just like every other 5th grader: pepperoni surrounded by gobs and gobs of cheese. Non-watery cheese, may I add. Note #3: I need to get over my fear of baking with yeast.)
It was also around this time that e-mail and the world wide web came to the common folk in the form of AOL...loved that. And while we're in la-la land circa 1996, remember that ubiquitous e-mail forward that viciously circled around in the form of revenge on Neiman-Marcus for their $250 cookie recipe trickery? Turns out the story is false (an untrue forward?! Is this even possible?), but 14 years ago it felt good to stick it to the Neiman-Marcus man and send that darn outrage of a story to every single person I knew. 14 years later, it feels so good to taste what all the fuss was about.
I am not going so far as to say that these cookies are worth the purported $250, but goodness. Look at these guys. I'm usually pretty ambivalent about nuts in cookies, but the walnuts here round out the texture and make them soooooo great. Also, the copious amount of oatmeal used means you can kind of trick yourself into thinking that these are healthy for you... hello, whole grains! My zeal for whole grains must have been why I thought I should make eleventy-hundred cookies. Seriously, this recipe makes eleventy-hundred cookies (which is why I have a ton of cookie dough in the freezer. PS to my socal road trip buddies in 2 weeks: you better believe these cookies are coming for you.)
Oatmeal Chocolate Chip Walnut Cookies (aka the Neiman-Marcus cookies)
(I don't know to whom I should attribute this recipe, but I will give credit to Caroline's post for getting my butt in the kitchen)
5 cups oatmeal
2 cups butter, softened
2 cups white sugar
2 cups brown sugar
4 cups flour
2 teaspoons baking soda
2 teaspoons baking powder
1 teaspoon salt
4 eggs, room temperature
1 tablespoon vanilla extract
4 cups chocolate chips (I used a lot less)
3 cups nuts (I used walnuts), chopped
Preheat oven to 375. Line a couple baking sheets with parchment paper.
In a food processor or blender, blend the oatmeal until powdery. In a separate bowl, whisk the pulverized oatmeal with the flour, baking soda, baking powder, and salt.
In the bowl of a stand mixer fitted with the paddle attachment (or with a hand mixer), cream together the butter, white sugar, and brown sugar. Add the eggs and vanilla; blend well. Gradually stir in the flour mixture; listen to your stand mixer scream bloody murder due to the enormous amount of dough you are forcing it to mix. Stir in the chocolate chips and nuts (I like chopping them in the food processor right after the oatmeal) (the recipe also says to grate an 8 oz. bar of chocolate into the dough at this point, but Mr. Stand Mixer screamed, "Enough is enough!", so I gave him a reprieve. (He's very temperamental.)
Roll into balls, place on cookie sheets, bake for 8-15 minutes (depending on how big you make them). Just check--when the tops start to turn golden, they're done. Let cool on the sheet for a minute before digging in!
And for freezing the dough: roll into balls, freeze on a plate or other large flat surface until really cold, then transfer to Ziploc bag (this process ensures the dough balls won't stick to each other when you're dying for freshly baked cookies in the near future).
I'll be in Chicago next weekend (my former co-love is cooking partner Lisa is getting hitched!), so my girl Jena will be guest blogging! Hooray! She's pretty much amazing, so get excited!!